Halloween Silhouettes

Posted by admin


Spooky Silhouettesfrom Better Homes and Garden
Framed as portraits, these spooky silhouettes add Halloween flair. To create the characters, download free patterns, enlarge to desired size, and trace onto black cardstock. Cut out the silhouettes using small, sharp scissors, glue to off-white cardstock, and frame.

New Retro Pumpkins in the Pumpkin Patch

Posted by admin

 Welcome New Halloween Pumpkins!
 Retro and Fun!


Fabrics by:  Riley Blake-Halloween Costume Clubhouse 
Pumpkins have a new design, you will see a lot of  black tulle, black rosettes and trims!

 Pumpkins are a great addition to your Holiday Decor!


 Welcome Chevron Pumpkins!


Pumpkins available in my etsy shop:

Polka Dots by Halloween Costume Clubhouse-Riley Blake
 Thanks for visiting!
Hooray--Fall is on its way!
Thank you Etsy Treasury List for 
including my Fall Pumpkins!
Fall Harvest
http://www.etsy.com/treasury/MTQ3OTMxNDF8MjcyMDYzMzg3NQ/fall-harvest?index=0


Spookyville Tales

Posted by admin


Welcome back to Spookyville.....
(re posted from Fall 2011)
I know it's a little early for Halloween, 
but I've had several requests for Halloween crafts for 
"Super Saturday" (Home Enrichment Activities) 
This one is a favorite and is simple to make.

Come along and Read some Spookyville Tales!
Today--It's all about a BOO-TI-FUL Halloween!
Make it Fun, Make it SIMPLE!
Halloween Books for Halloween Decor
The fun part is coming up with Creative Book Titles.
You can even personalize with Family Names.
All you need is a few supplies:  
Black and White Polka Dot Wrapping Paper or paper
of your choice, Wood Scraps, (you can pre-cut at Lowes), jute twine, rick rack,
Halloween Book Titles can be made from your Computer Printer
More ideas are coming withe these same wood scraps!


You can dress them up with tulle, ribbons and trims!
Thanks for visiting!

Happy Halloween

Posted by admin

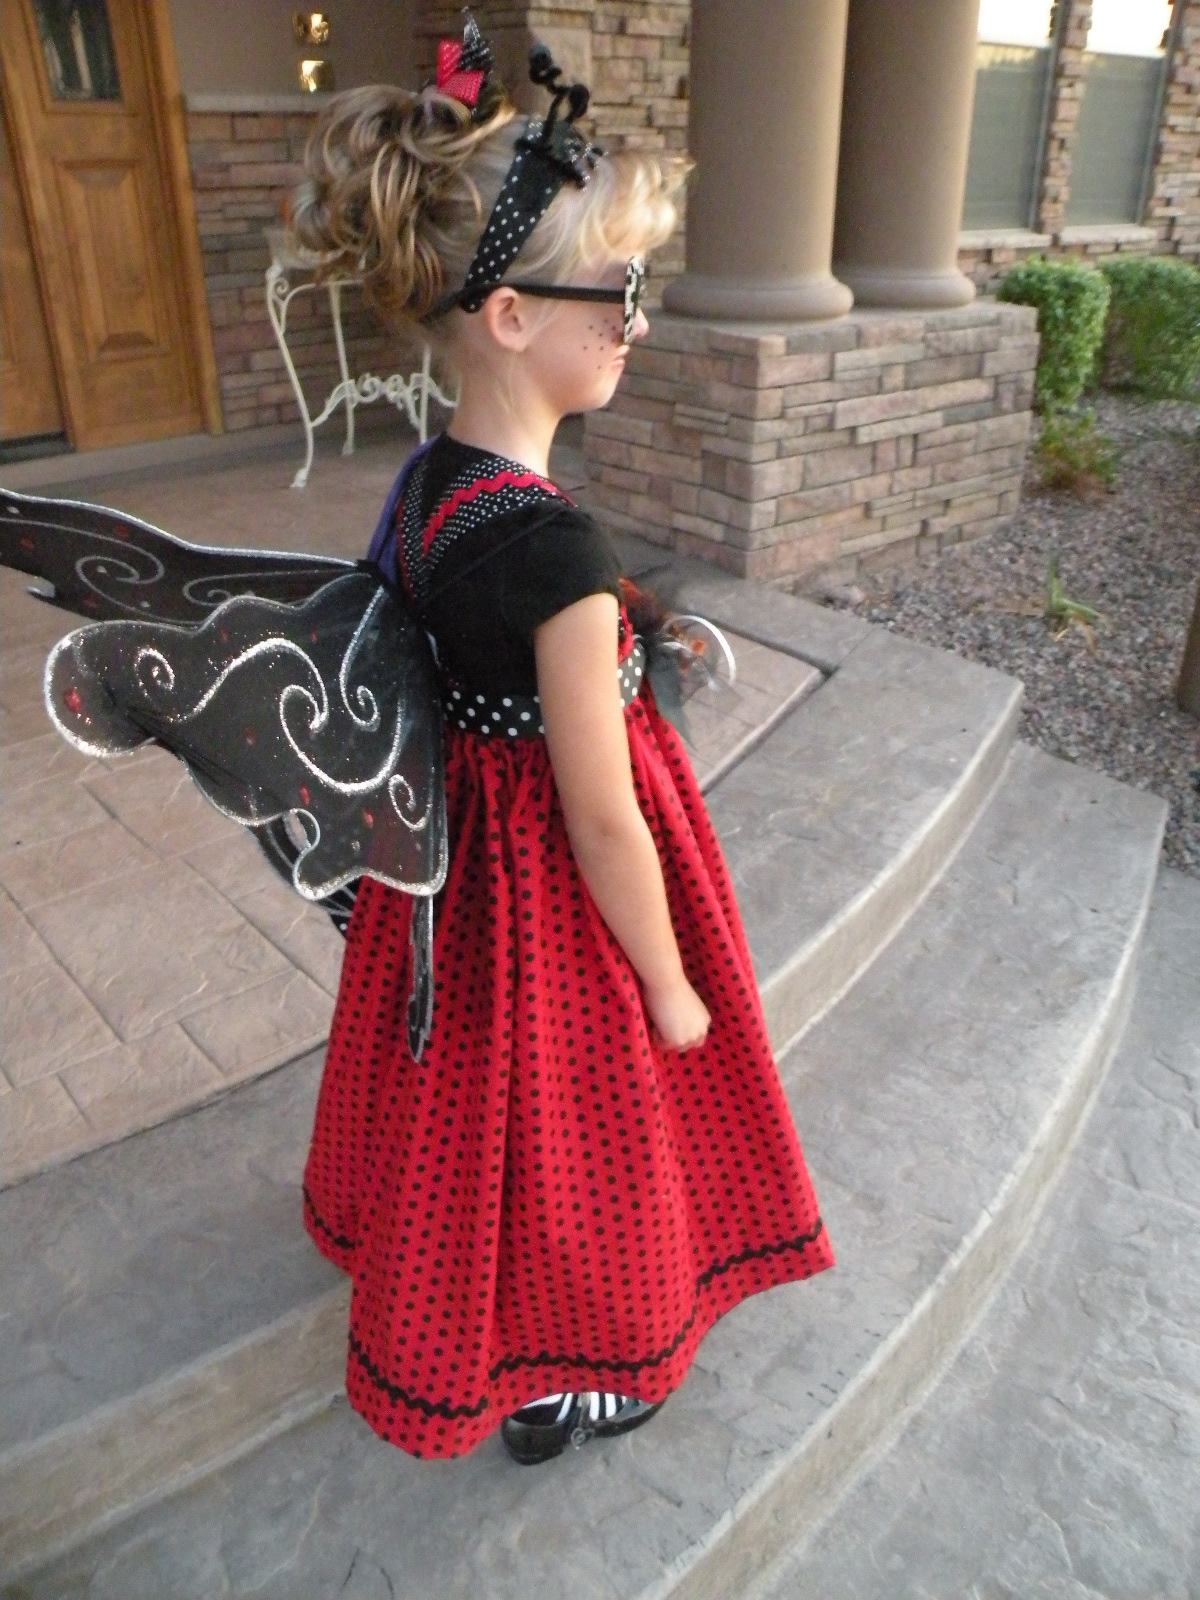
Hello Little Lady Bug! 
I found a cute little red and black polka dot lady bug sitting on my porch today.
A little lady bug waiting for school to begin so she can fly!
A Halloween Parade is soon to begin!


Materials:
shoes spray painted from white to black
red and black polka dot fabric from JoAnn's Fabric Store
(I created my own pattern.)
Fairy wings made into lady bug wings with red and silver jewels
Handmade Headband with pipe cleaners and black buttons.
Off the little butterfly goes with her Motor Cross big brother by her side.
(no pictures from the Motor Cross Champion at his request)

May your footsteps be Spooky, and Fun!
Happy Halloween!

Fun Friday

Posted by admin

Hello Spooktacular Friends!
                               Are you all ready for Halloween?


Let the FUN begin!
 Bring on the TREATS!
Here'a a little Friday Fun!


Source: None via Brenda on Pinterest

Source: None via Brenda on Pinterest


Source: None via Brenda on Pinterest

Have a BOO-TI-FUL weekend!
I will return with my ladybug project for my sweet little bug!
A work in progress!

Witch's Brew

Posted by admin

Here's a little Witches Bew to whip up for Halloween Treats!
Especially FUN for school age kids!


A great Halloween activity for kids.
Check it out!
What The Teacher Wants:

Spooktacular Treats

Posted by admin

The Twelve Days Of Creative Fall
Sept 1-Sept 12, 2011
Spooktacular Treats
Spooktacular Apron

Inspiration from:


Halloween Party

I've got my eyes on you!

Sweet Treats
flickr.com

Spooktacular Apron for your Spooktacular Treats!
From Window Valance to Apron!

A Seasonal Apron that can be used with all Seasons and Holidays!
Change the kitchen towel to match the season!
This is one of my favorite aprons to make!
It is SIMPLE and made from a WAVERLY WINDOW VALANCE!
Supplies:
One Waverly Valance on clearance $8.99 /reg.$ 39.99 (Tuesday Morning)
Waverly makes excellent window valances, the fabric is great quality and the valance is lined,
which will make a wonderful apron!
The fun part-- change your apron with the seasons!
One Seasonal Halloween Dish Towel

1.  Cut your valance  on both sides to the appropriate size.
This valance has a v-shape, measure accordingly so the "V" is in the middle of your apron.
2.  Unpick the ends of the valance.
3.  Make a 1/4 hem and sew.
4.  Leave a opening for ties to go through the top of the valance where you
would normally put your curtain rod.
5.  Add ribbon or any kind of trim to the top of the apron
by sewing the ribbon on both sides of the apron.
(You are placing your ribbon/trim as a hanger for your kitchen towel.)
6.  Add your seasonal kitchen towel
7.  You will be able to change your kitchen towel throughout the Seasons.
I like this apron because, you can easily throw your kitchen towel in the washer and
use your apron time after time!
8.  Make fabric ties that will feed through the casing of your apron and tie in the back.
You are finished!
ENJOY!
Thank you for visiting!
I will see you all tomorrow!